


Welcome to my Scrivener Review and Video Tips page. Below you will find the following:
- my in-depth review of Scrivener.
- Scrivener tutorials. Video tutorials of Scrivener in action. Each video is less than five minutes long and captures one feature of the many robust features Scrivener offers.
- Each video is a Scrivener tutorial showing real life use of Scrivener. As I write my new fiction book, I’ll record a Scrivener tutorial so you can see Scrivener used in real life (writing an actual novel) versus just a demo.
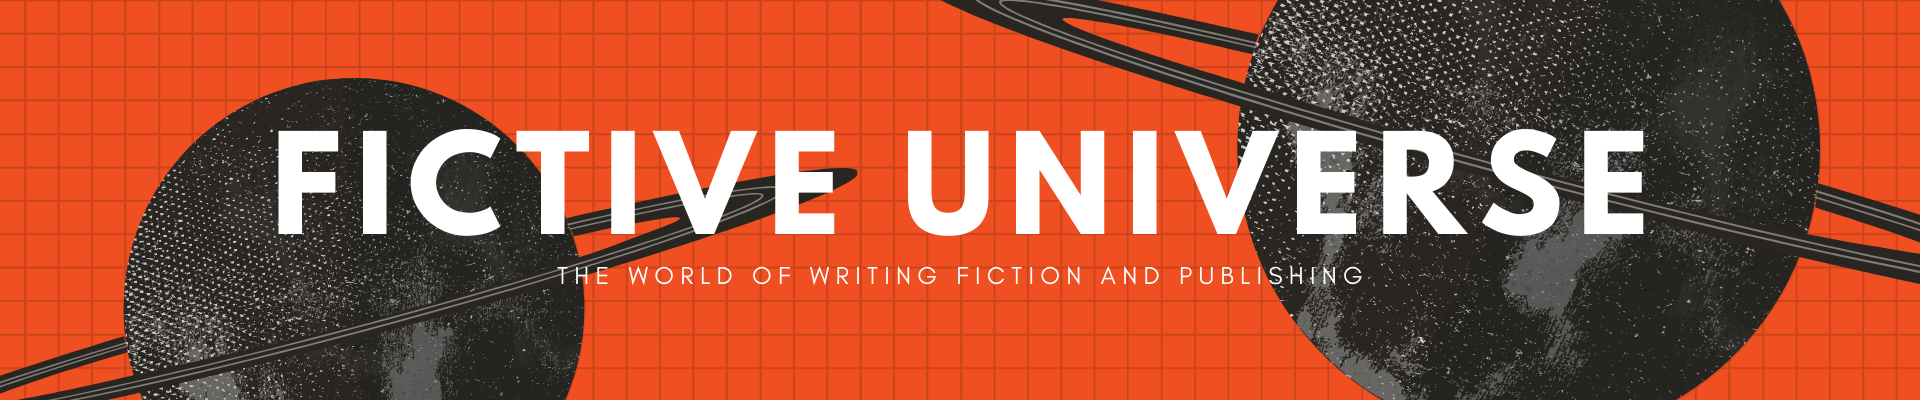
It all started with a Scrivener blank page, the end result was my first published novel, “The Asset
Scrivener Review
Writing 80,000 some words can be a daunting task. You more than likely have a lot of research notes, documents, outlines, which you need to organize so you can write your book. Enter Scrivener.
To quote from their website: Scrivener is a powerful content-generation tool for writers that allows you to concentrate on composing and structuring long and difficult documents. While it gives you complete control of the formatting, its focus is on helping you get to the end of that awkward first draft.
Trying to do all that with MS Word or Open Office can make an already daunting process, even more stressful. I tried to write a novel with Word and Open Office and the manuscript always got away from me, and I abandoned it. It’s not very novelist friendly, especially, if like me, you don’t write linearly from A to B, to C. Scrivener changed all that for me. I have since published my first fiction book, The Asset, which is an Amazon Best Seller in the Espionage and Political Thriller lists. I’ve now finished my second manuscript, and I’m currently writing my third book. I attribute a lot of that success to Scrivener.
My love for the software has turned me into a self-appointed Scrivener evangelist. I feel compelled to spread the word amongst my fellow writers. There are a few “Scrivener reviews” online, but I haven’t seen one that actually shows you the software in action with an actual manuscript, not just a dummy Scrivener file for screenshot purposes. So I’m going to show you my favorite features of Scrivener with screenshots from the actual manuscript for my upcoming book “She’s Gone”.
A quick caveat. I’m not a Scrivener expert nor am I uber techie with software, I’m just a writer that likes Scrivener. The biggest mistake new Scrivener users can make is to try to master all its robust features from the get-go. Trust me, you don’t want to go down that rabbit hole, you’ll end up frustrated and you might not end up appreciating how it can help you.
The first time I fired up Scrivener, I saw all its bells and whistles, and I became overwhelmed trying to figure out how to use them all. I ended up quitting and not touching the software for over a year. My second go-round, I just focused on writing and starting adding features as I saw fit.
There are still features that I don’t use and I learn about more features from other folks, videos, and websites, and I incorporate them into my process. But there might be features I never use, and that’s okay. You can click here for more advanced Scrivener books. I also recommend you watch the official Scrivener Video Tutorials.
How I use Scrivener to Write Fiction Thrillers (Click on the images to enlarge them)
Writing

The writing editor is where you can just write your book. If you know how to use MS Word, then you will be familiar with the writing editor. It has the similar features, for example, spell/grammar check. You can select different fonts, align/indent paragraphs, all of that stuff and more.
 To really focus on writing, you can select the “full composition mode” which will darkened your entire computer monitor and increase the writing space so you can focus on just writing. For those who remember, it’s like having a piece of paper in a typewriter and nothing more you can do with, but write. You can adjust the settings of “full composition mode” to your liking.
 I like to set my entire writing project on the corkboard view. I create a folder for each chapter (color coded with a green tag for “chapter”).
Each chapter is then displayed on the right in its own folder, and it’s also displayed on the cork board. Each chapter represented by an index notecard.
I can look at my entire manuscript at a glance. And one of my favorite features, I can easily re-arrange chapter and scenes by just dragging and dropping them. You’re not held to linear writing with Scrivener.
You can write the last scene right from the get-go if you want, maybe that’s the scene in your head and you want to write it now, no problem. Write it, then when your first draft is done, drag it and drop it where you want it to appear.

Here is a screenshot of the scenes. I create a new file within the chapter folder for each scene in that chapter. I label them using the same color-coding process as I do for my chapters.
Scenes are color-coded with a blue tag. I can see every scene on the left, in the binder section, as text files within the chapter folder, or I can see them as notecards on the cork board. Each scene is pinned as a notecard on my cork board.
Research
As I wrote in the introduction, Scrivener has many, many features. I focus on and primarily use a few of them regularly. I already covered the writing features of Scrivener, now I’ll show you the research feature. This is one of my favorite features of Scrivener.
Before Scrivener (BS), I would have notes, article clippings, outlines, loose papers, all gathered during research, and they were scattered all over.
Well, now it can be stored within Scrivener, and it’s available at your fingertips. Most of our research is now done online so it’s even easier to add all that data to your Scrivener project. But even if you still have papers or notes offline, I would suggest scanning them into your computer so you can add it to Scrivener that you have all your research in one spot.

Using the same organization as described above, it stores all my research items on the left, in the binder, and they also appear as index cards on the corkboard. All easily viewable and easy to access as needed. No need to dig around folders on your desk or search your computer’s hard drive, with Scrivener, it’s all right there.
As I peruse online doing my research for my novel, if I find an item of interest, I just add it to my Scrivener project.
What kind of research items can be added to Scrivener?
Anything you find useful, for example:
Articles

Videos


Websites/Blogs

Places
Another powerful Scrivener feature (which I use every day when I’m researching my WIP) is the Places section in the binder.
As a fiction writer, I make up a lot of stuff, but readers don’t give you much leeway when you’re writing about actual places, locations, weapons, etc., you need to get your facts straight here; If its 380 miles from San Francisco to Los Angeles, you better not have your hero make the drive in an hour (especially during rush hour); Research it.

I use Google Maps, and I add that map to my Places folder in the binder so it’s at my fingertips when I’m writing. Google Maps has a huge reach, my WIP has a scene in rural Somalia, and sure enough, that area and town are on Google Maps. Boom added to my Scrivener places folder in the binder.
I’ll add anything that will help me write a more realistic scene into the places binder; I’ll go to YouTube and search “driving in Mexico city” where I’ll be able to pick from a plethora of videos to get a realistic view of driving there. I’ll add those YouTube video to my Places binder.
If I’m writing a scene in a park I’ve never visited, I’ll Google it. I’ll drag any photographs of that park, trees, benches, sidewalk, etc, into my places binder so I can refer to it when writing that scene.
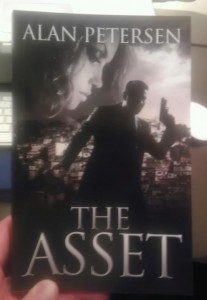
Characters
The “Characters” feature is pretty awesome. It’s another feature I use daily while in research mode. Then I can easily go back to it as needed when writing.
It really lets you flesh out a character. I’ll write a bio. Add any notes, and if I find photographs that make me think about my character, I’ll drag it into the “Characters” section of my Scrivener binder.
Compile

Scrivener makes it easy to compile your Scrivener files into just about any document you might need and a whole bunch you’ll probably never need.
When I’ve finished the writing process on Scrivener, I need to send out my manuscript to my beta readers, editor, and proofreaders, here is where the compile feature is awesome. Beta readers, editors, proofreaders prefer to have an MS Word document so they can keep track of changes using those features on Word. How do you get that to them? No problem takes a nanosecond. You select the Word doc version, click on compile, Scrivener does its magic, voilà, you’ll have a Word doc version of your manuscript ready.
You have many options to compile your manuscript from Scrivener into a… standard manuscript format (uses the formatting standards expected by professional editors, so compile your manuscript into this standard, and it’s ready to be emailed to your editor), a Kindle .mobi file to sell your book as an ebook on Amazon, a .epub file so you can sell your ebook at others retailer sites like B&N.com, and that’s just two of the biggies. You can also compile your manuscript into a paperback format so you can publish print books using Create Space.

More Than Just Fiction

Scrivener can also be used for writing non-fiction; it even has a non-fiction template you can use, but my experience with it has been writing fiction books. But as you can see from the screenshot you can use Scrivener for fiction, non-fiction, screenplays, poetry & lyrics, and miscellaneous, which includes research papers and reports.
As you can see, Scrivener is quiet robust and in my opinion, a must-have tool for fiction writers. I highly recommend it. It comes available in Mac and Windows versions. I use the Mac version. It’s my understanding the Windows version wasn’t as good, but they’ve made a lot of progress the last year or two (2013) so you should still give it a try.
Both versions come with a full 30 day license so you can give it a good whack before buying. At $45 for Mac and $40 for Windows, it’s dirt cheap, and worth every penny.
Scrivener Video Tutorials
I’ve been slowly, but surely building a nice set of video tutorials for Scrivener. Below you will find the video Scrivener tutorials. Each video is less than five minutes, and it focuses on one feature/task of the Scrivener writing software in action. This keeps the tutorials short and to the point, so you don’t have to sit through a 30 minute video in search of a specific feature of Scrivener.
If you have suggestions for a Scrivener Video Tutorial, please let me know in the comments section on this page.
Scrivener Tutorial: “Places”
Scrivener Tutorial: “Research”
Scrivener Tutorial: “Find & Replace”
Scrivener Video Tutorial: “Tweet from Scrivener”
Scrivener Video Tutorial: “Nonlinear Writing Drag & Drop”
Scrivener Video Tutorial: Scrivener iOS Review


 My name is Alan Petersen I write mysteries and thrillers. You can check out my Amazon page
Pity it doesn’t fix incorrect use of words (its vs it’s, for example) and excessive and misplaced use of commas.
That’s where a professional editor and proofreader come in handy. It doesn’t matter how great the software is, it can’t do everything for you. 🙂
I agree. I read all the books, but when I sat down to write I did it one step at a time. I love being able to google an article and keep it with the chapter or scene where I need the info. Still have to use cork board.
A bonus for me, is that by having the articles, videos, etc., saved within Scrivener, I don’t get distracted online.
Hi Thanks for the post… have been on the fence about investing in yet more software… but I’m convinced. I’m going to quote you a little in an article I’m writing and will link back to this article.
thanks, Jay
No problem. They do have a full access 30-day trial so you can try it before you buy it.
Hi Alan Petersen,
Your site came up when I was searching for reviews on Scrivener. Glad to find you as you have one of the most in-depth single articles on how the software works and your tutorials are a treasure!
Good idea to showcase a real-life scenario (writing your book). As a result, I went over to Amazon to check out the synopsis and reviews and was sooooo happy that it’s my kinda reading (and looks exciting).
Bought Kindle edition. 🙂 Will share it in social venues as well. Thanks for everything.
Hi Vernessa,
Thank you for stopping by! I’m glad you found the Scrivener review helpful! And thank you so much for giving my book a try, I hope you enjoy it! Once you’ve finished reading it, please do leave a review on Amazon, even if it’s a one-star, I learn from all reviews and welcome them all (the good, the bad, and the ugly). 🙂
Cheers.
Alan